Contents
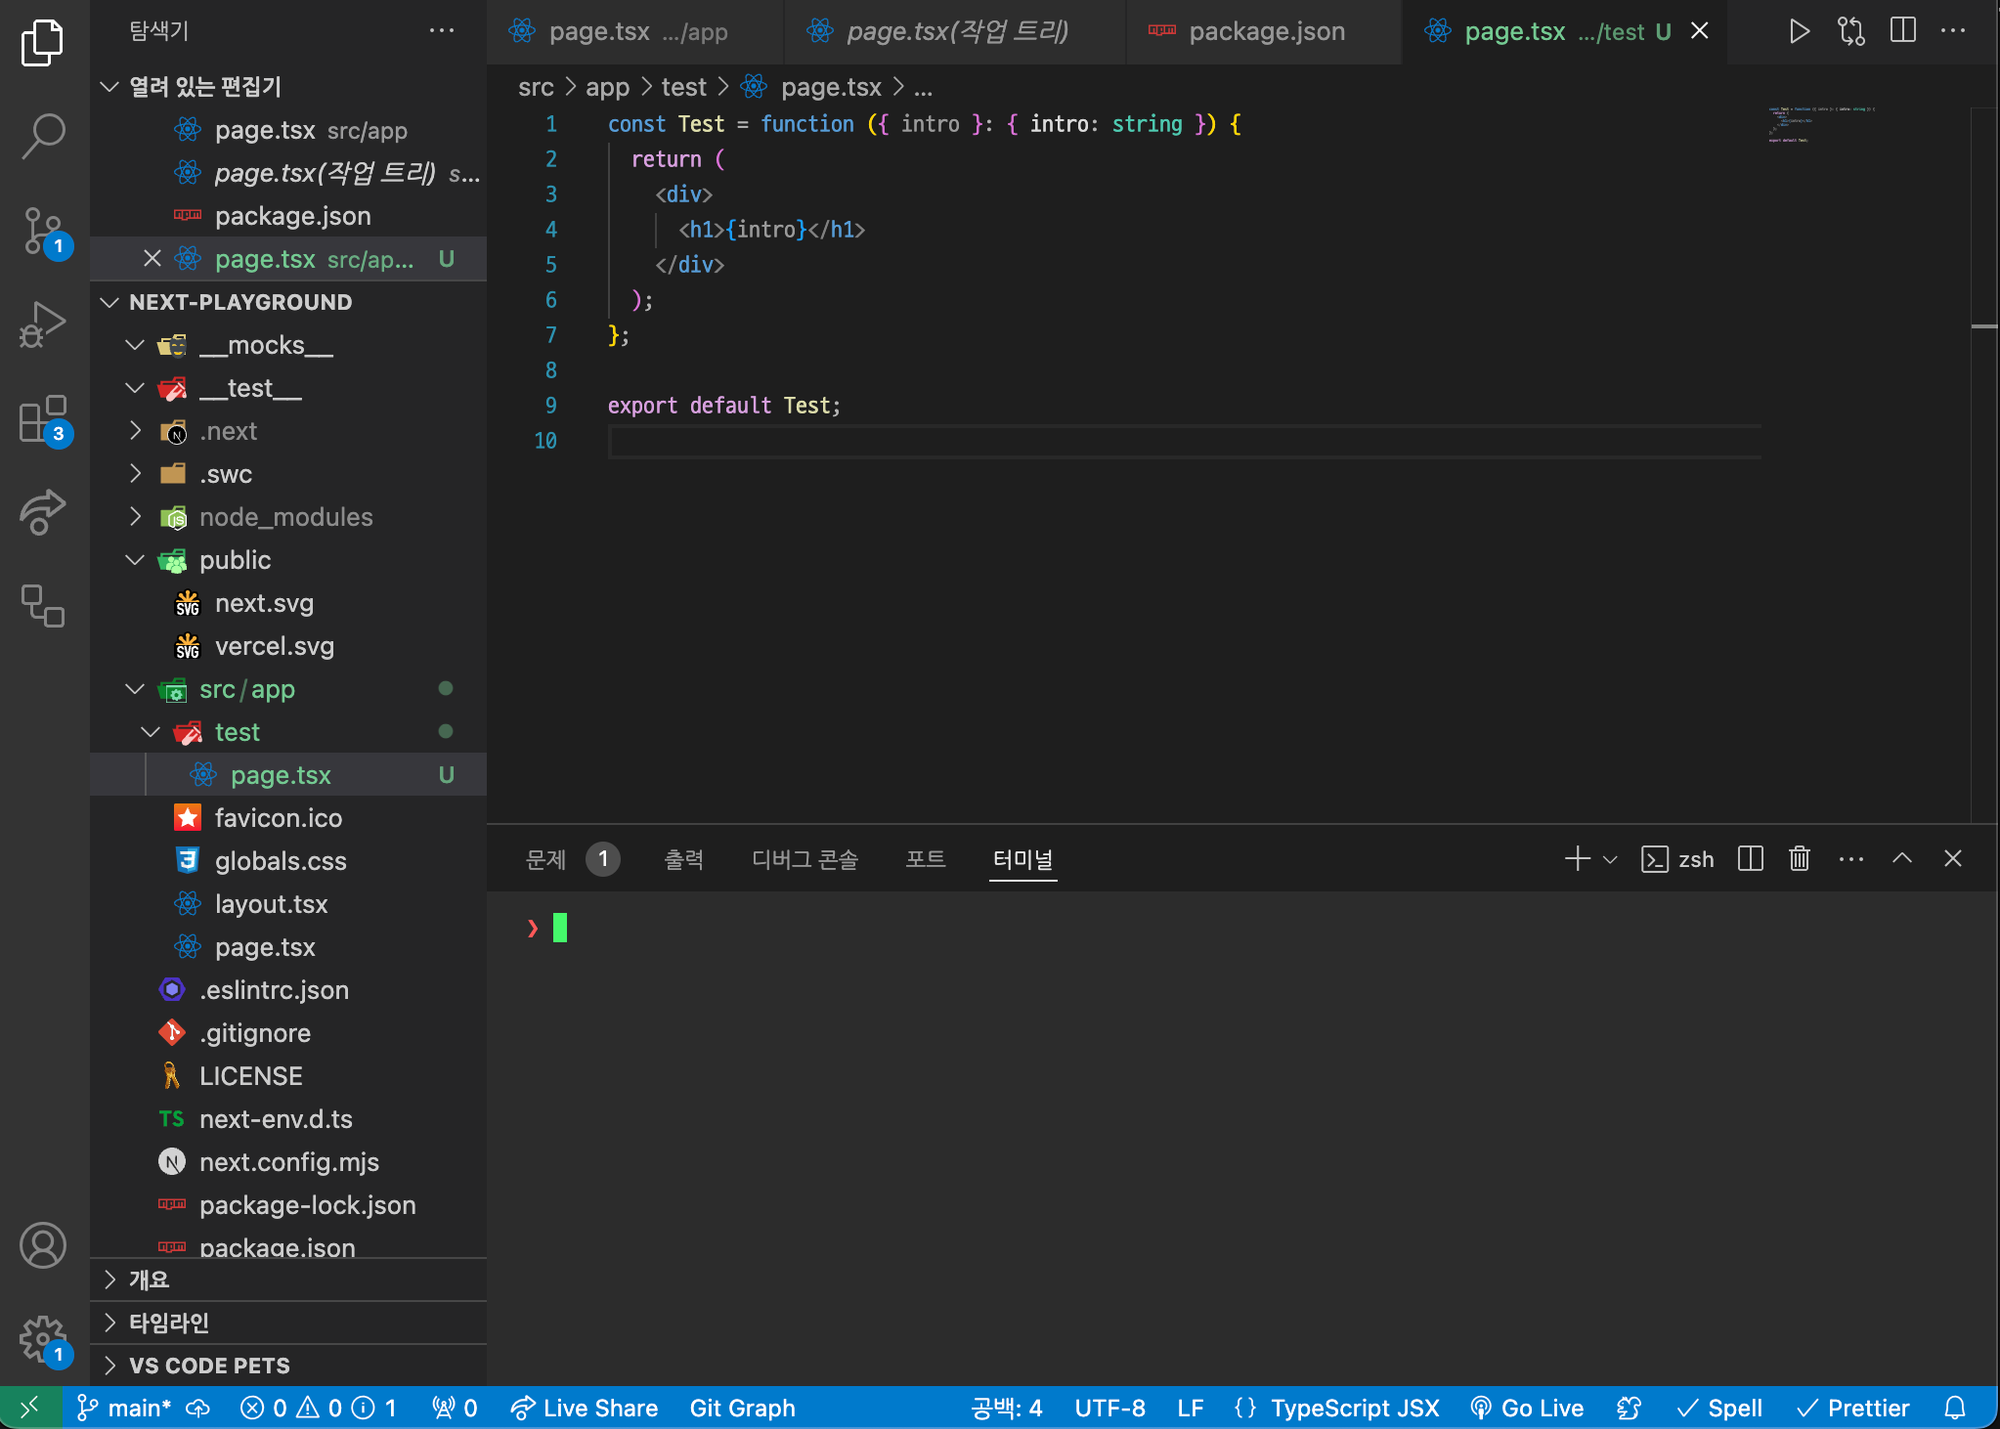
- Test 컴포넌트 만들기
- msw설치
- init 해서 mockServiceWorker.js 만들기
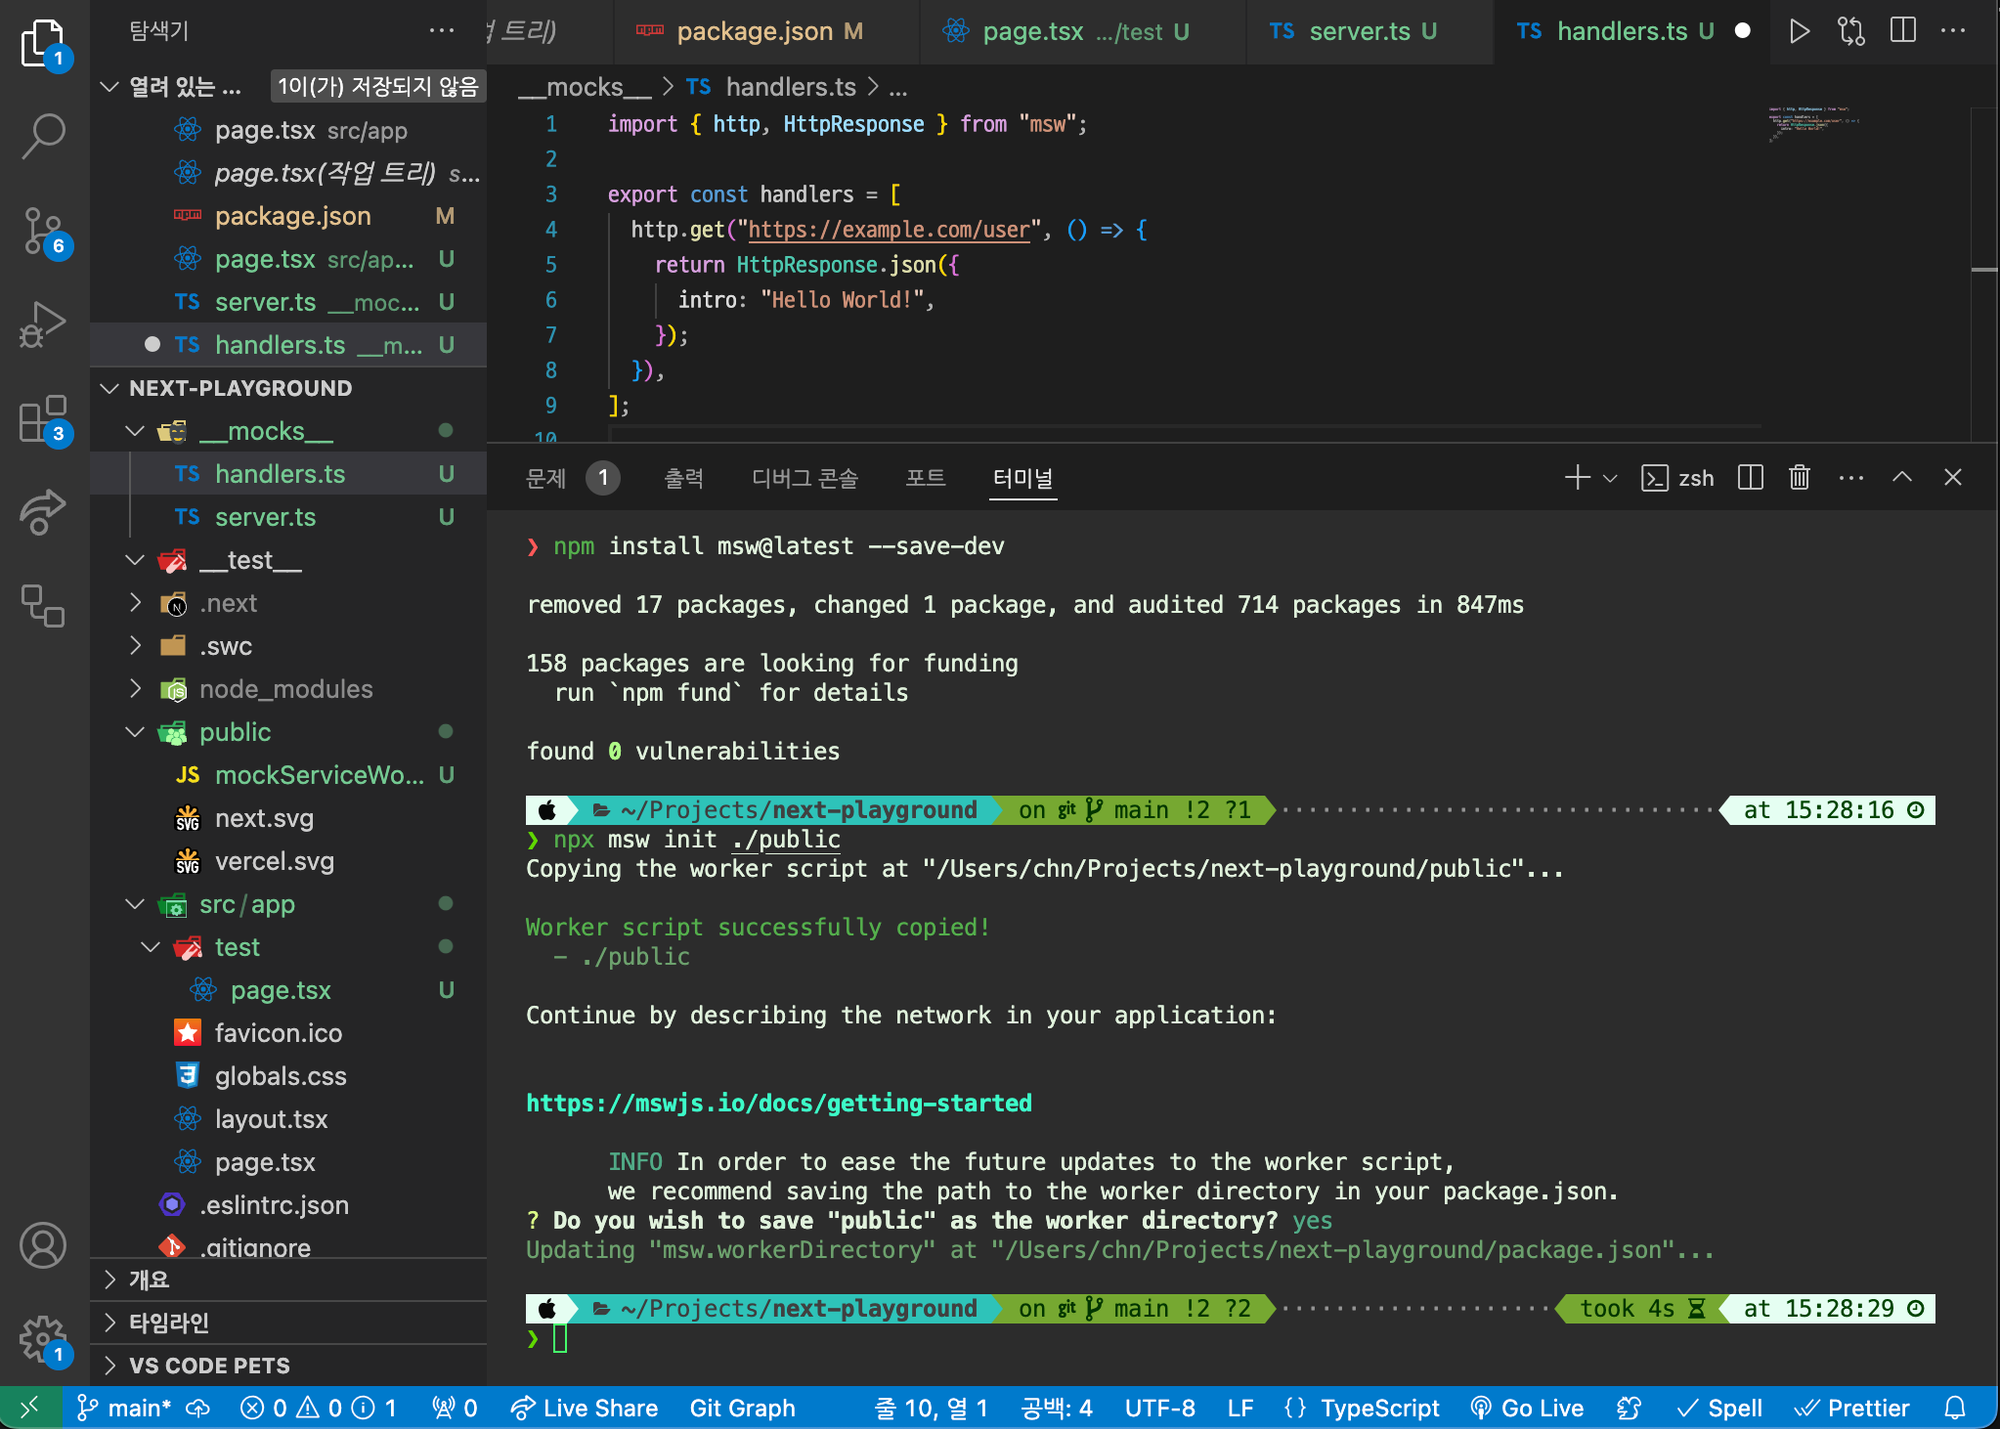
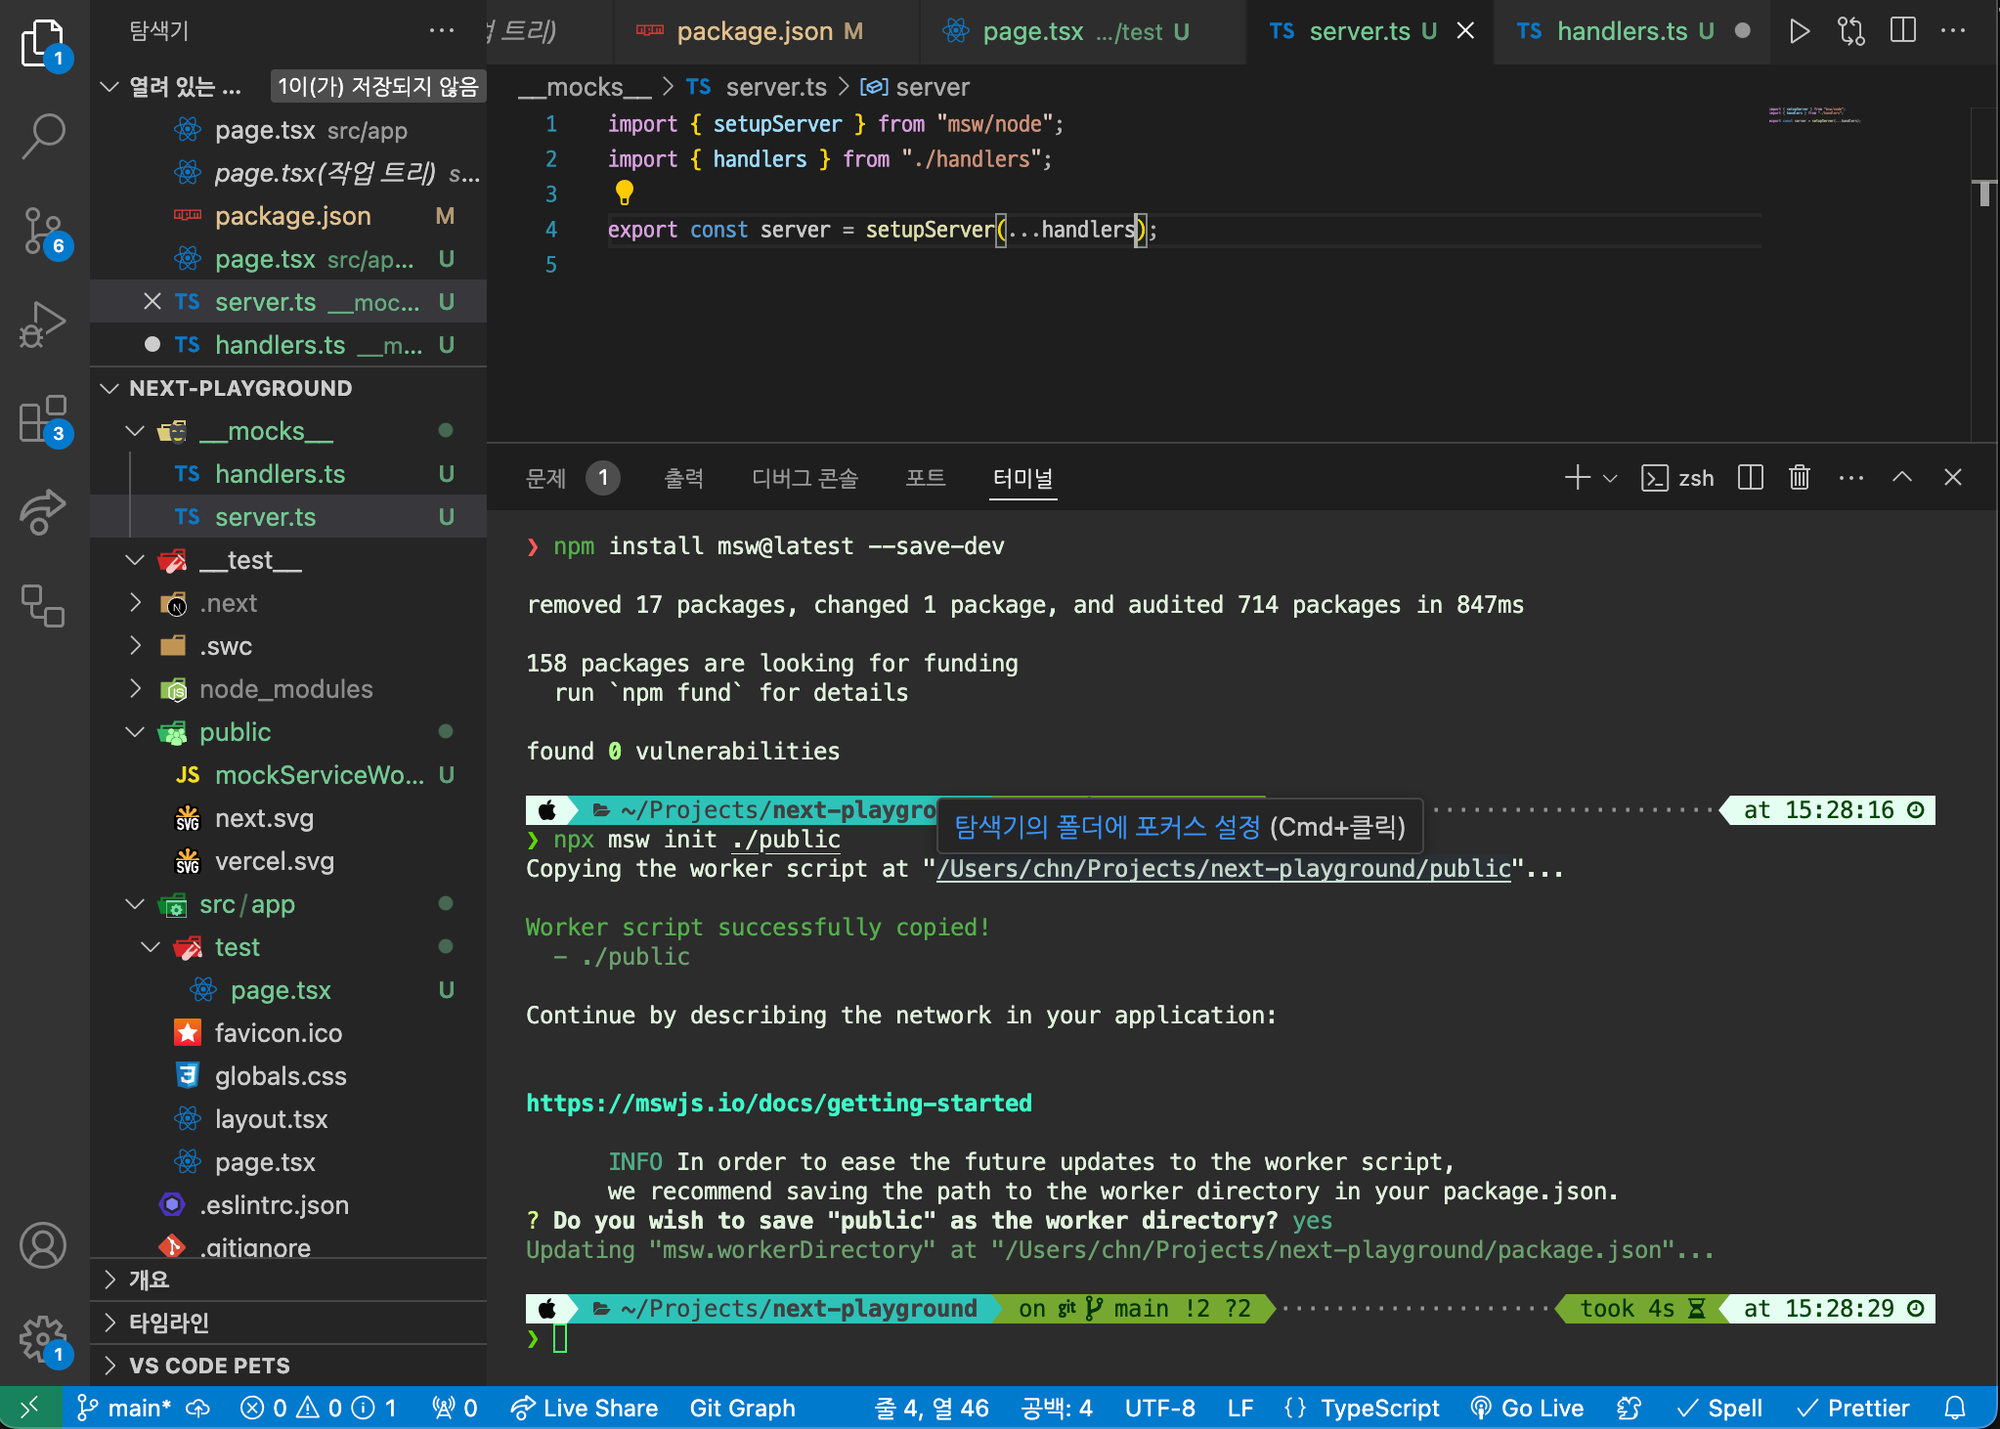
- mocks폴더 만들고 server, handlers만들기
- src/setupTest.ts 파일 만들기
- /__test__/Test.spec.tsx 만들어주기
- undici 설치
- root에 jest.polyfills.js 작성
- jest.config.ts에 폴리필 추가해주기
- 테스트를 실행해보면…
- 성공
Test 컴포넌트 만들기
msw설치
npm install msw@latest --save-devinit 해서 mockServiceWorker.js 만들기
npx msw init ./public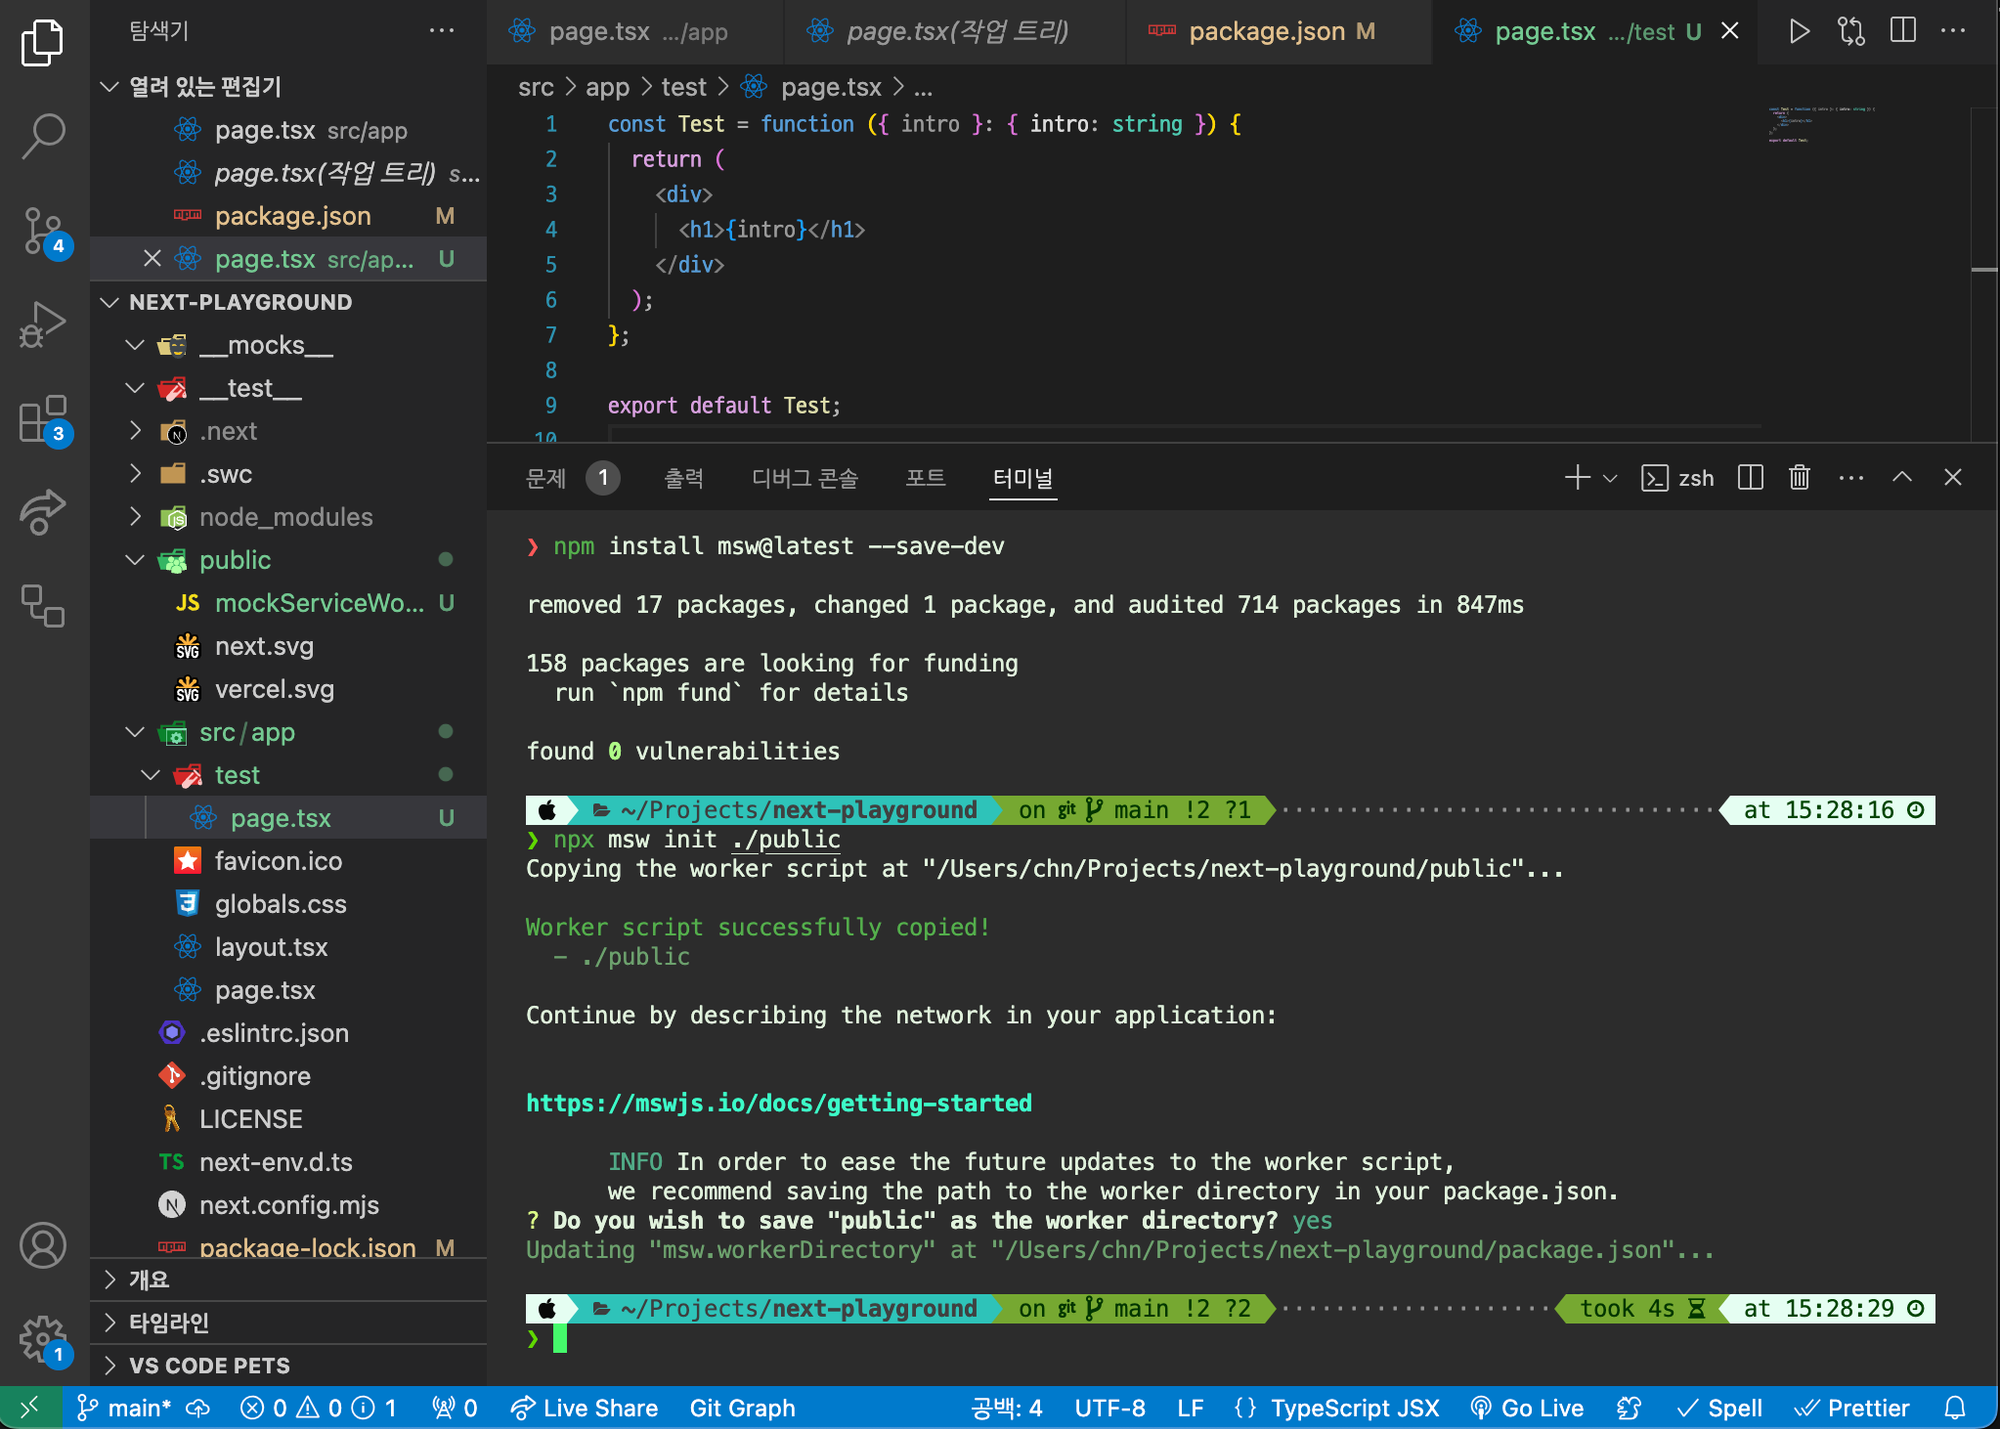
mocks폴더 만들고 server, handlers만들기
워커가 돌아가는 곳을 public으로 설정할거냐는 물음이 나옵니다.
src/setupTest.ts 파일 만들기
- root에 jest.config.ts가 있는지 확인하고 없으면 만들어줍시다.
//jest.config.ts
import type { Config } from "jest";
import nextJest from "next/jest.js";

const createJestConfig = nextJest({
  // Provide the path to your Next.js app to load next.config.js and .env files in your test environment
  dir: "./",
});

// Add any custom config to be passed to Jest
const config: Config = {
  coverageProvider: "v8",
  testEnvironment: "jsdom",
  // Add more setup options before each test is run
  // setupFilesAfterEnv: ['<rootDir>/jest.setup.ts'],
};

// createJestConfig is exported this way to ensure that next/jest can load the Next.js config which is async
export default createJestConfig(config);- 다음과 같이 코드 추가
import type { Config } from "jest";
import nextJest from "next/jest.js";

const createJestConfig = nextJest({
  // Provide the path to your Next.js app to load next.config.js and .env files in your test environment
  dir: "./",
});

// Add any custom config to be passed to Jest
const config: Config = {
  coverageProvider: "v8",
  testEnvironment: "jsdom",
  // Add more setup options before each test is run
  // setupFilesAfterEnv: ['<rootDir>/jest.setup.ts'],
  setupFilesAfterEnv: ["./src/setupTests.ts"],
};

// createJestConfig is exported this way to ensure that next/jest can load the Next.js config which is async
export default createJestConfig(config);
jest에서 test를 실행할 때 어떤 설정들을 해줄건지 지정해주는 파일을 만들어주면 됩니다.
저는 setupTests.ts로 만들어주었습니다.
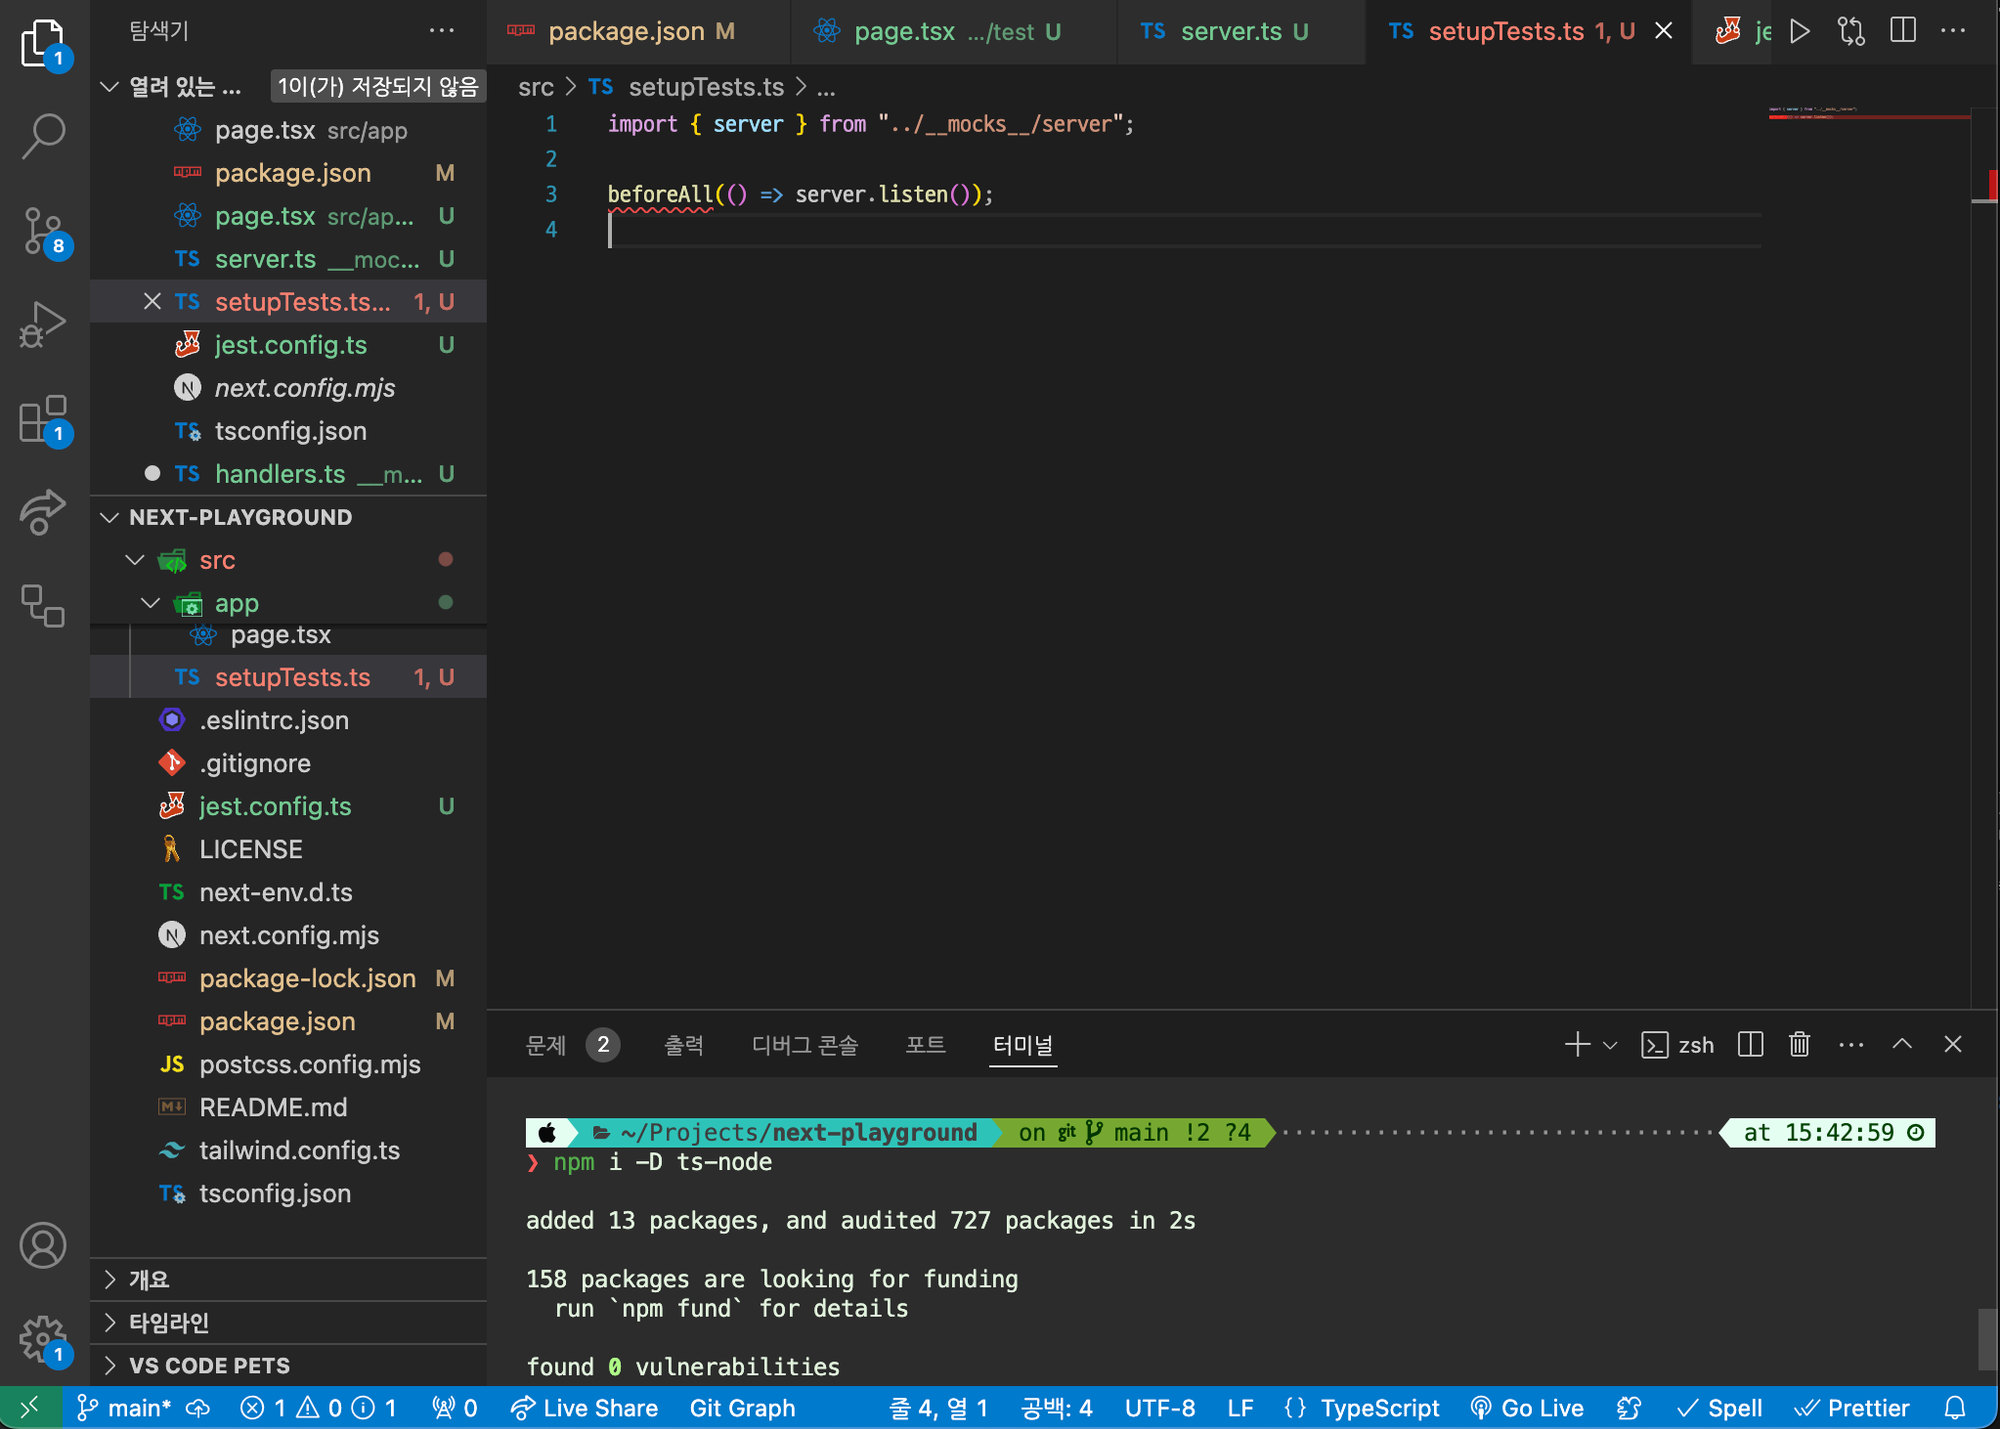
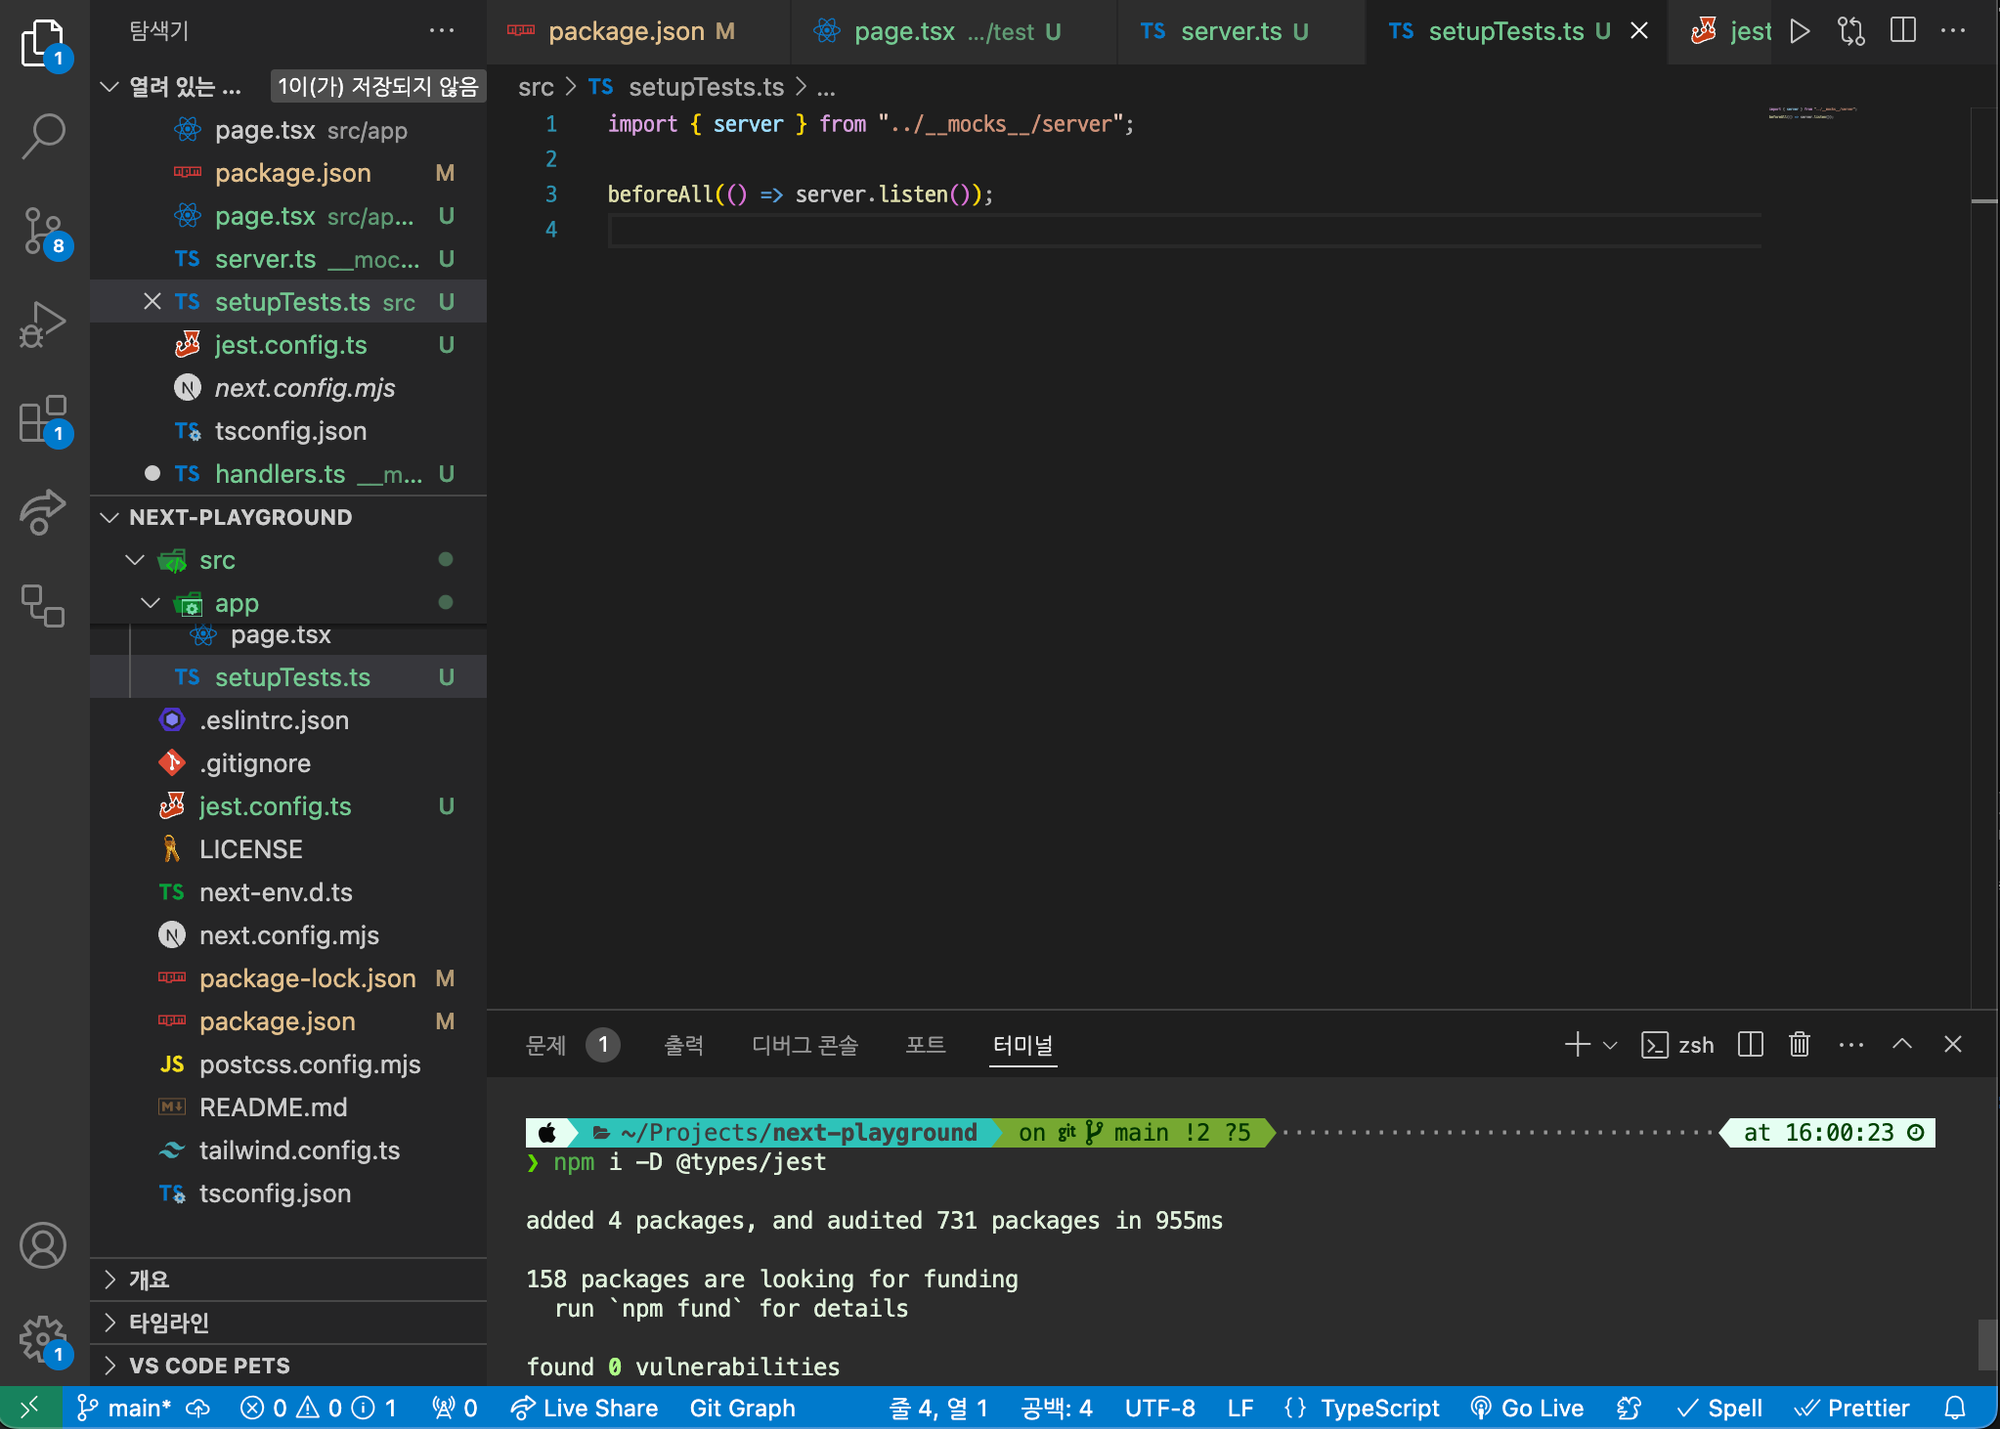
이렇게 빨간줄이 뜨면 @types/jest를 설치 안하지는 않았나 의심해봅시다.
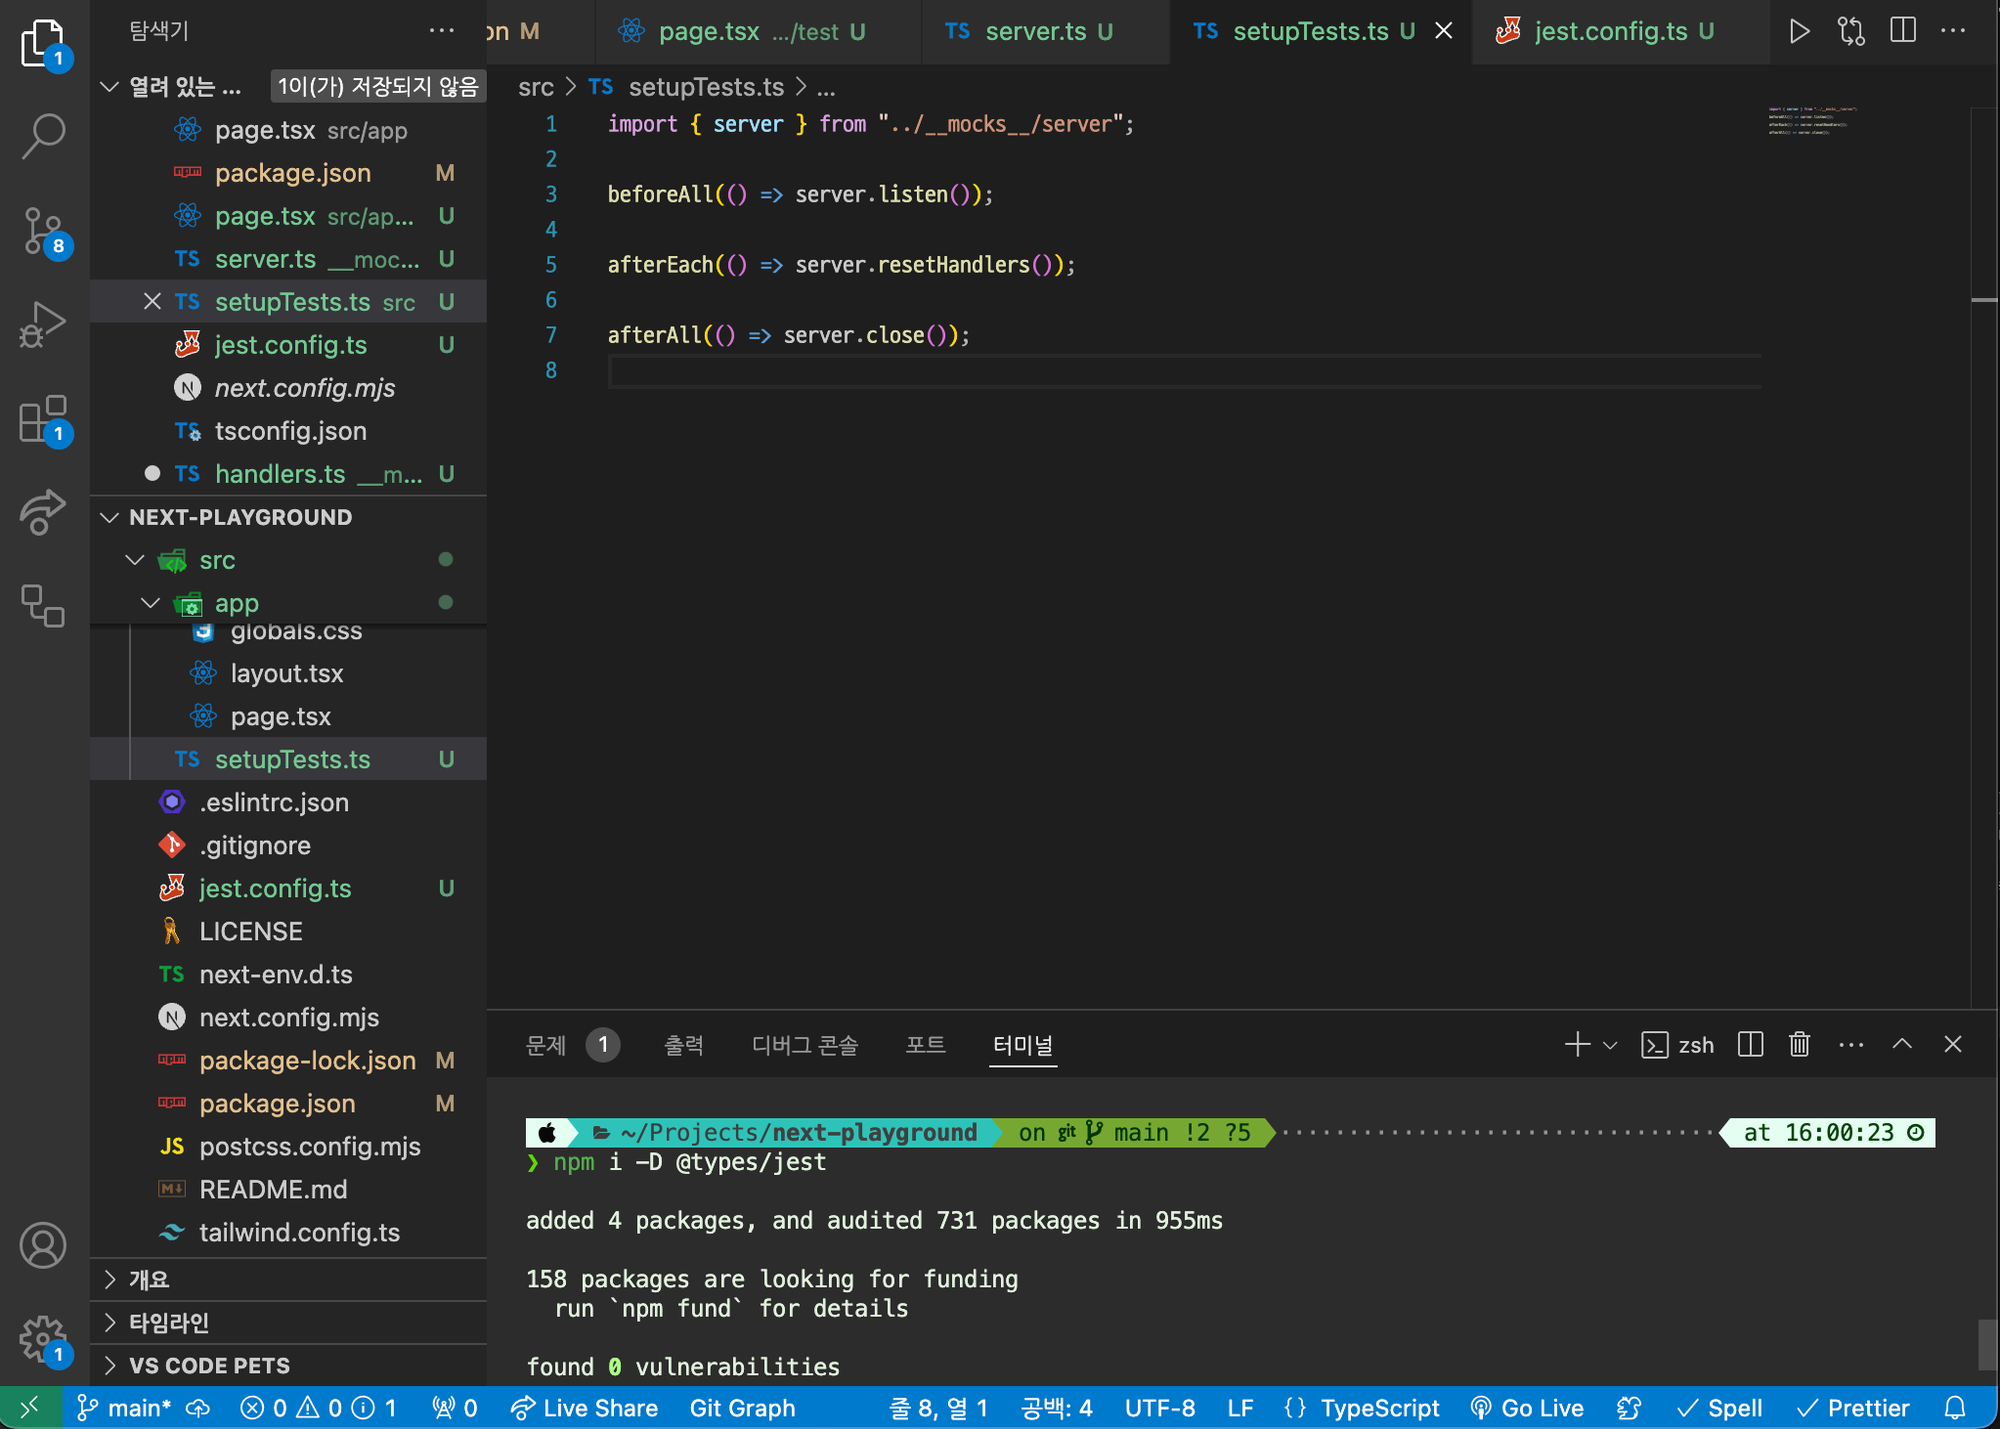
최종적으로는 아래와 같이 써주면 됩니다.
beforeAll은 테스트를 시작하기 전에 뭘 해줄건지, afterEach는 각 테스트가 끝나고 뭘할건지, afterAll은 모든 테스트가 끝나면 뭘 할건지 적어주는 옵션입니다.
/__test__/Test.spec.tsx 만들어주기
만들어주고 test돌려보면 test 작동이 실패합니다.
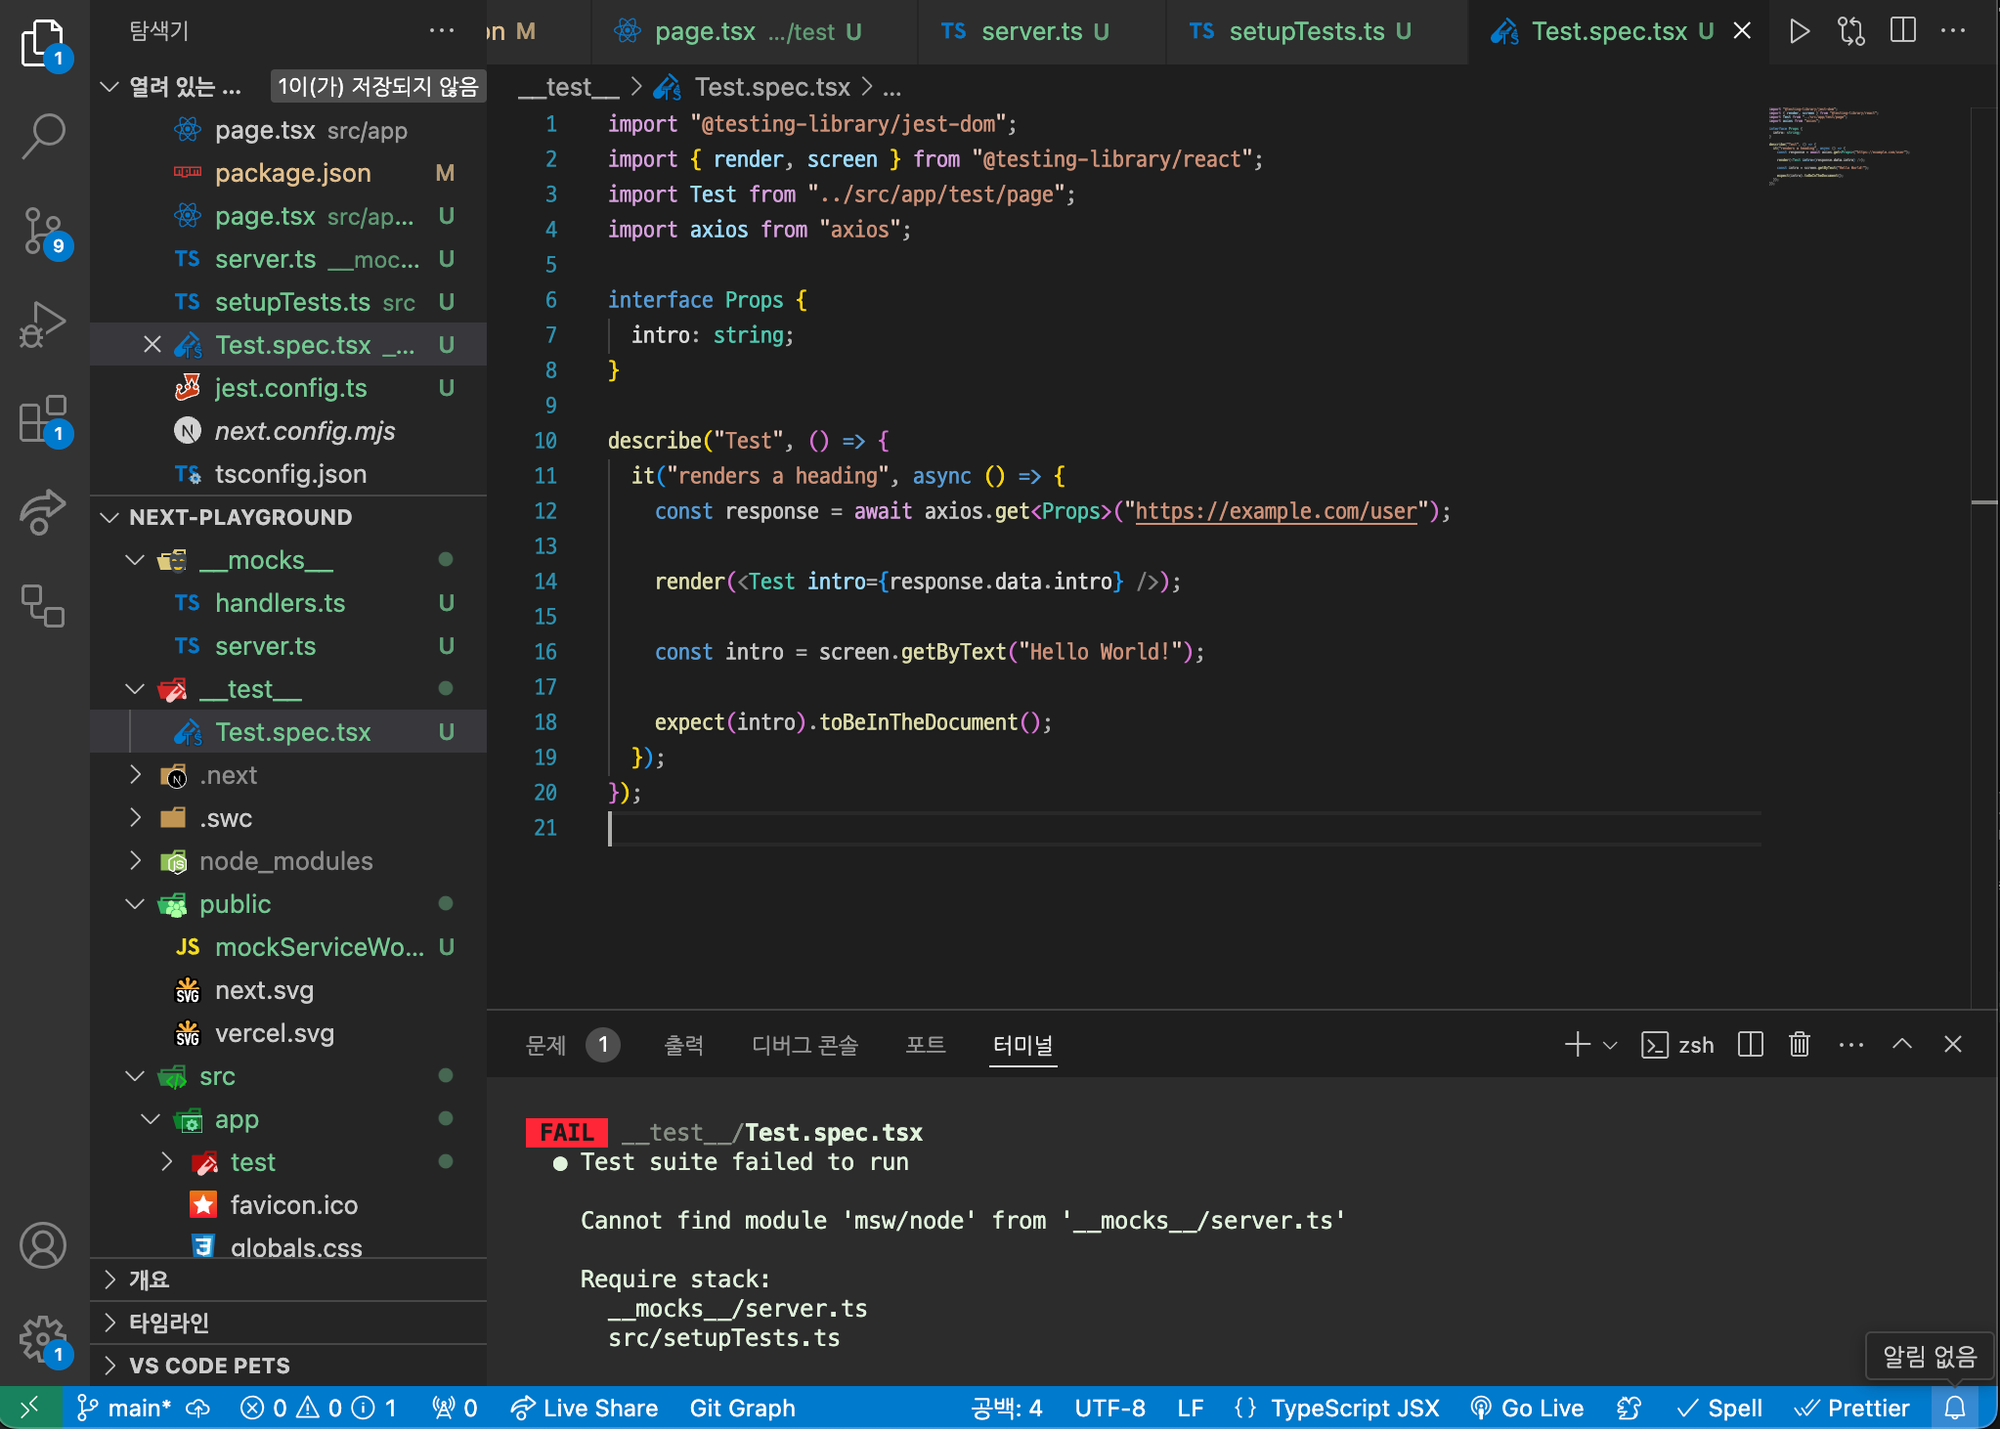
몇가지 설정을 더 해줘야 테스트를 돌릴 수 있습니다.
undici 설치
https://mswjs.io/docs/migrations/1.x-to-2.x/#frequent-issues
undici라는 라이브러리를 설치해줘야한다고 공식문서에 나옵니다. 설치를 해줍시다.
root에 jest.polyfills.js 작성
그리고 루트 경로에 jest.polyfills.js를 작성해줍시다.
// jest.polyfills.js
/**
 * @note The block below contains polyfills for Node.js globals
 * required for Jest to function when running JSDOM tests.
 * These HAVE to be require's and HAVE to be in this exact
 * order, since "undici" depends on the "TextEncoder" global API.
 *
 * Consider migrating to a more modern test runner if
 * you don't want to deal with this.
 */

const { TextDecoder, TextEncoder } = require("node:util");
const { ReadableStream } = require("node:stream/web");

Object.defineProperties(globalThis, {
  TextDecoder: { value: TextDecoder },
  TextEncoder: { value: TextEncoder },
  ReadableStream: { value: ReadableStream },
});

const { Blob, File } = require("node:buffer");
const { fetch, Headers, FormData, Request, Response } = require("undici");

Object.defineProperties(globalThis, {
  fetch: { value: fetch, writable: true },
  Blob: { value: Blob },
  File: { value: File },
  Headers: { value: Headers },
  FormData: { value: FormData },
  Request: { value: Request },
  Response: { value: Response },
});
jest.config.ts에 폴리필 추가해주기
jest.config.ts의 config에 다음과 같은 옵션을 추가해줍니다.
import type { Config } from "jest";
import nextJest from "next/jest.js";

const createJestConfig = nextJest({
  // Provide the path to your Next.js app to load next.config.js and .env files in your test environment
  dir: "./",
});

// Add any custom config to be passed to Jest
const config: Config = {
  coverageProvider: "v8",
  testEnvironment: "jsdom",
  // Add more setup options before each test is run
  // setupFilesAfterEnv: ['<rootDir>/jest.setup.ts'],
  setupFilesAfterEnv: ["./src/setupTests.ts"],
  setupFiles: ["./jest.polyfills.js"],
  testEnvironmentOptions: {
    customExportConditions: [""],
  },
};

// createJestConfig is exported this way to ensure that next/jest can load the Next.js config which is async
export default createJestConfig(config);
여기서 setupFiles뿐만 아니라 testEnvironmentOptions의 customExportConditions 옵션도 지정을 해줘야 하는데, 그 이유는 jest가 서버에서도 실행되고 브라우저에서도 실행이 되는데, 그때 export의 방식을 결정해줘야하기 때문입니다.
https://jestjs.io/docs/configuration#testenvironmentoptions-object
테스트를 실행해보면…
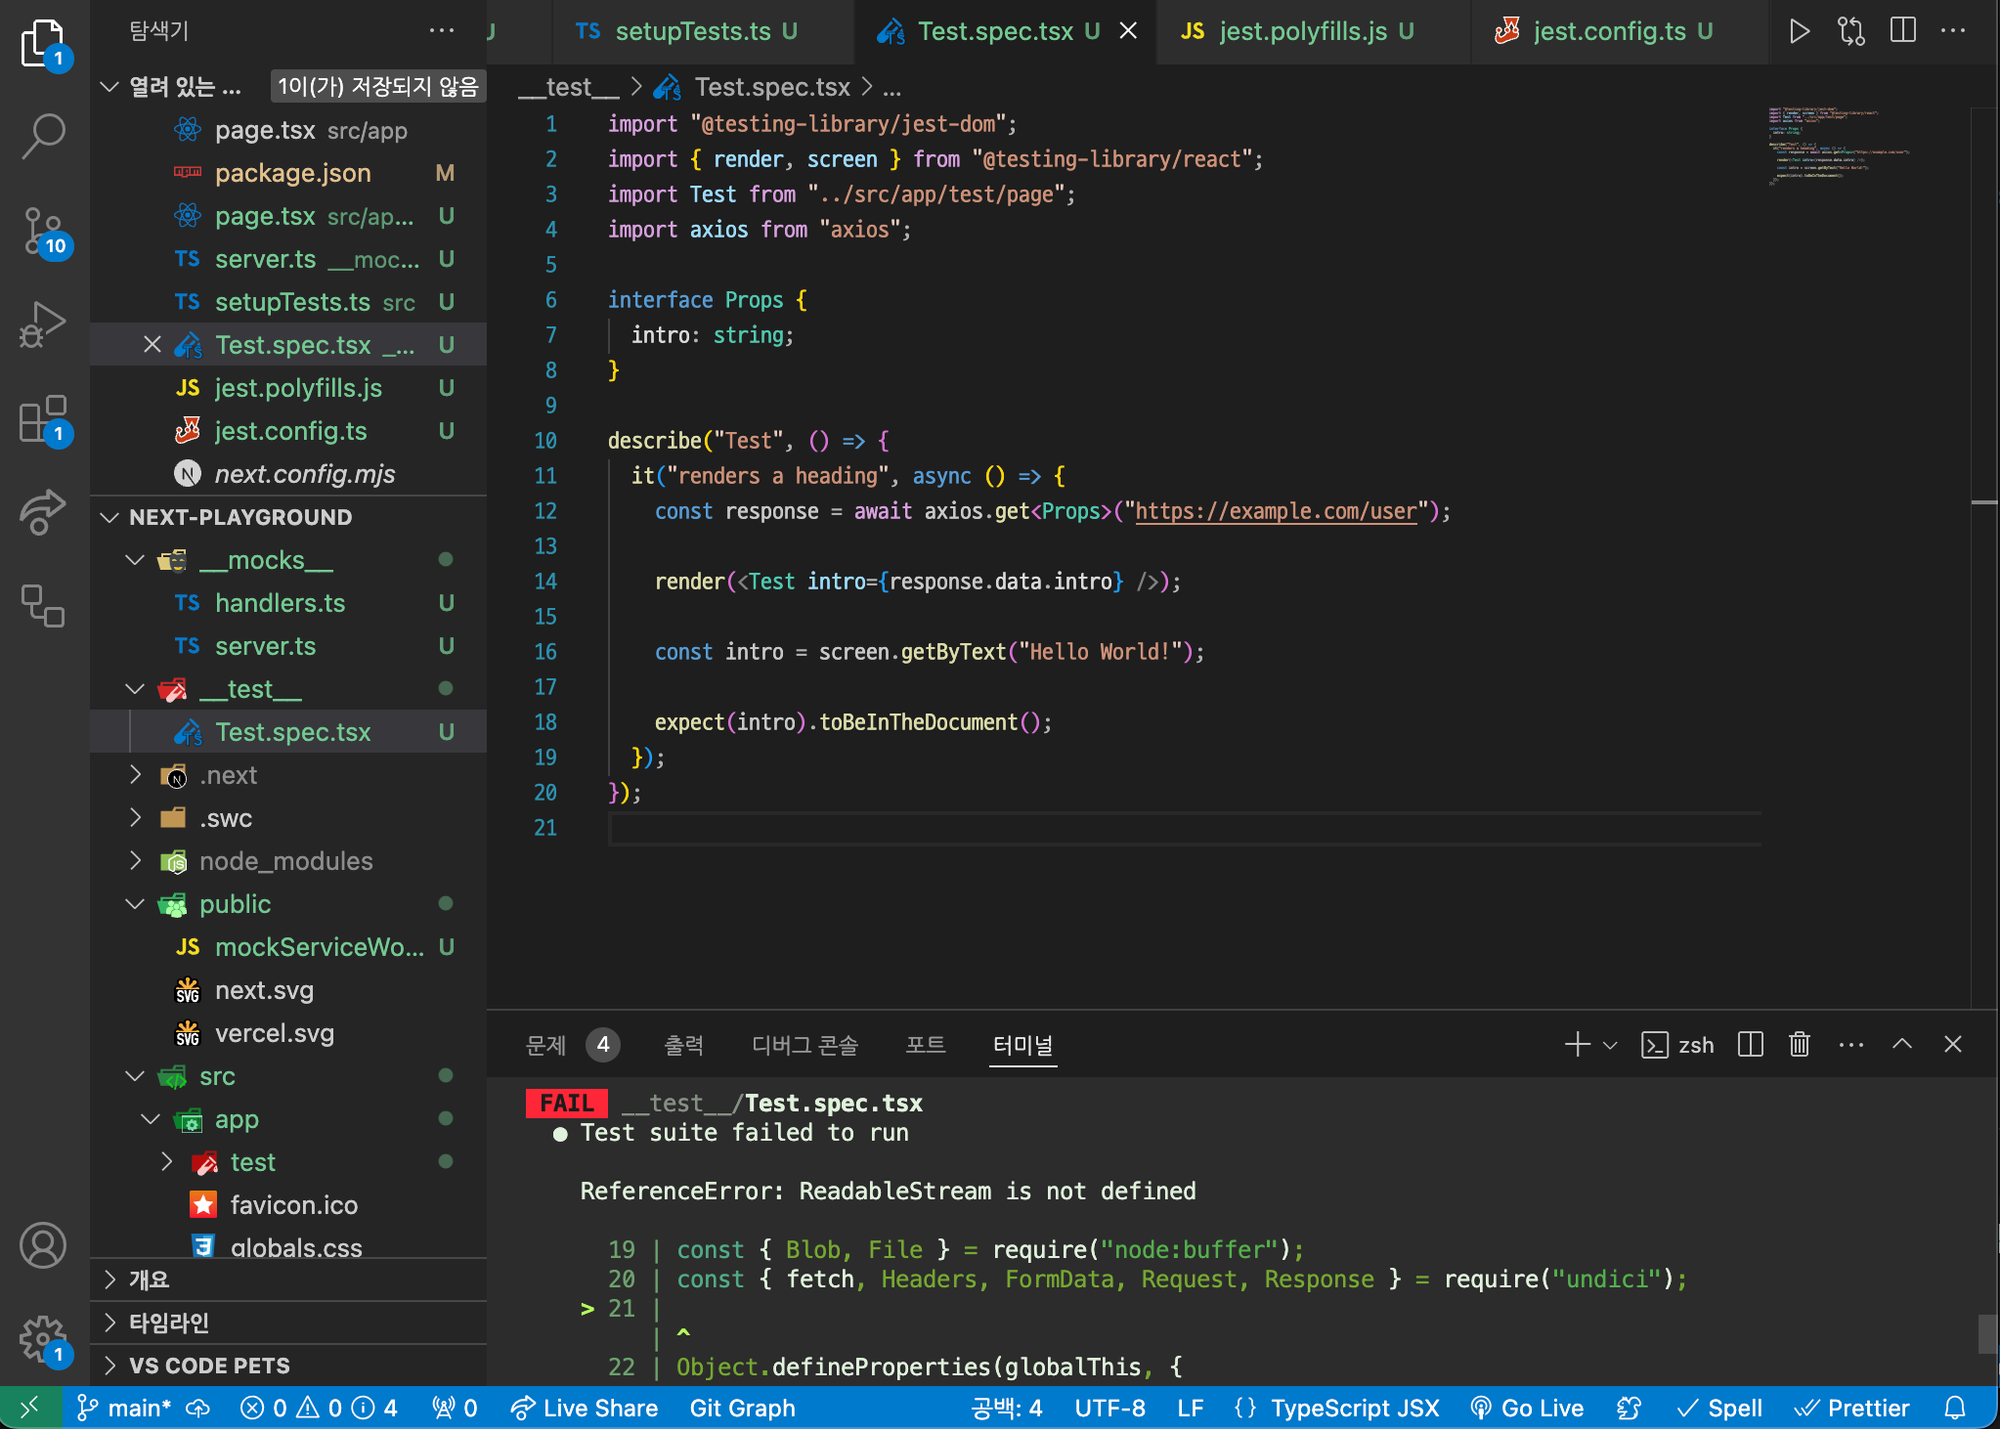
또 실패합니다. 문제는 jest.polyfills.js에 있음 ReadableStream을 정의해줘야하는데에 있습니다.
다음과 같이 ReadableStream을 불러와주고, Object.defineProperties에 추가해줍시다.
// jest.polyfills.js
/**
 * @note The block below contains polyfills for Node.js globals
 * required for Jest to function when running JSDOM tests.
 * These HAVE to be require's and HAVE to be in this exact
 * order, since "undici" depends on the "TextEncoder" global API.
 *
 * Consider migrating to a more modern test runner if
 * you don't want to deal with this.
 */

const { TextDecoder, TextEncoder } = require("node:util");
const { ReadableStream } = require("node:stream/web");

Object.defineProperties(globalThis, {
  TextDecoder: { value: TextDecoder },
  TextEncoder: { value: TextEncoder },
  ReadableStream: { value: ReadableStream },
});

const { Blob, File } = require("node:buffer");
const { fetch, Headers, FormData, Request, Response } = require("undici");

Object.defineProperties(globalThis, {
  fetch: { value: fetch, writable: true },
  Blob: { value: Blob },
  File: { value: File },
  Headers: { value: Headers },
  FormData: { value: FormData },
  Request: { value: Request },
  Response: { value: Response },
});
성공
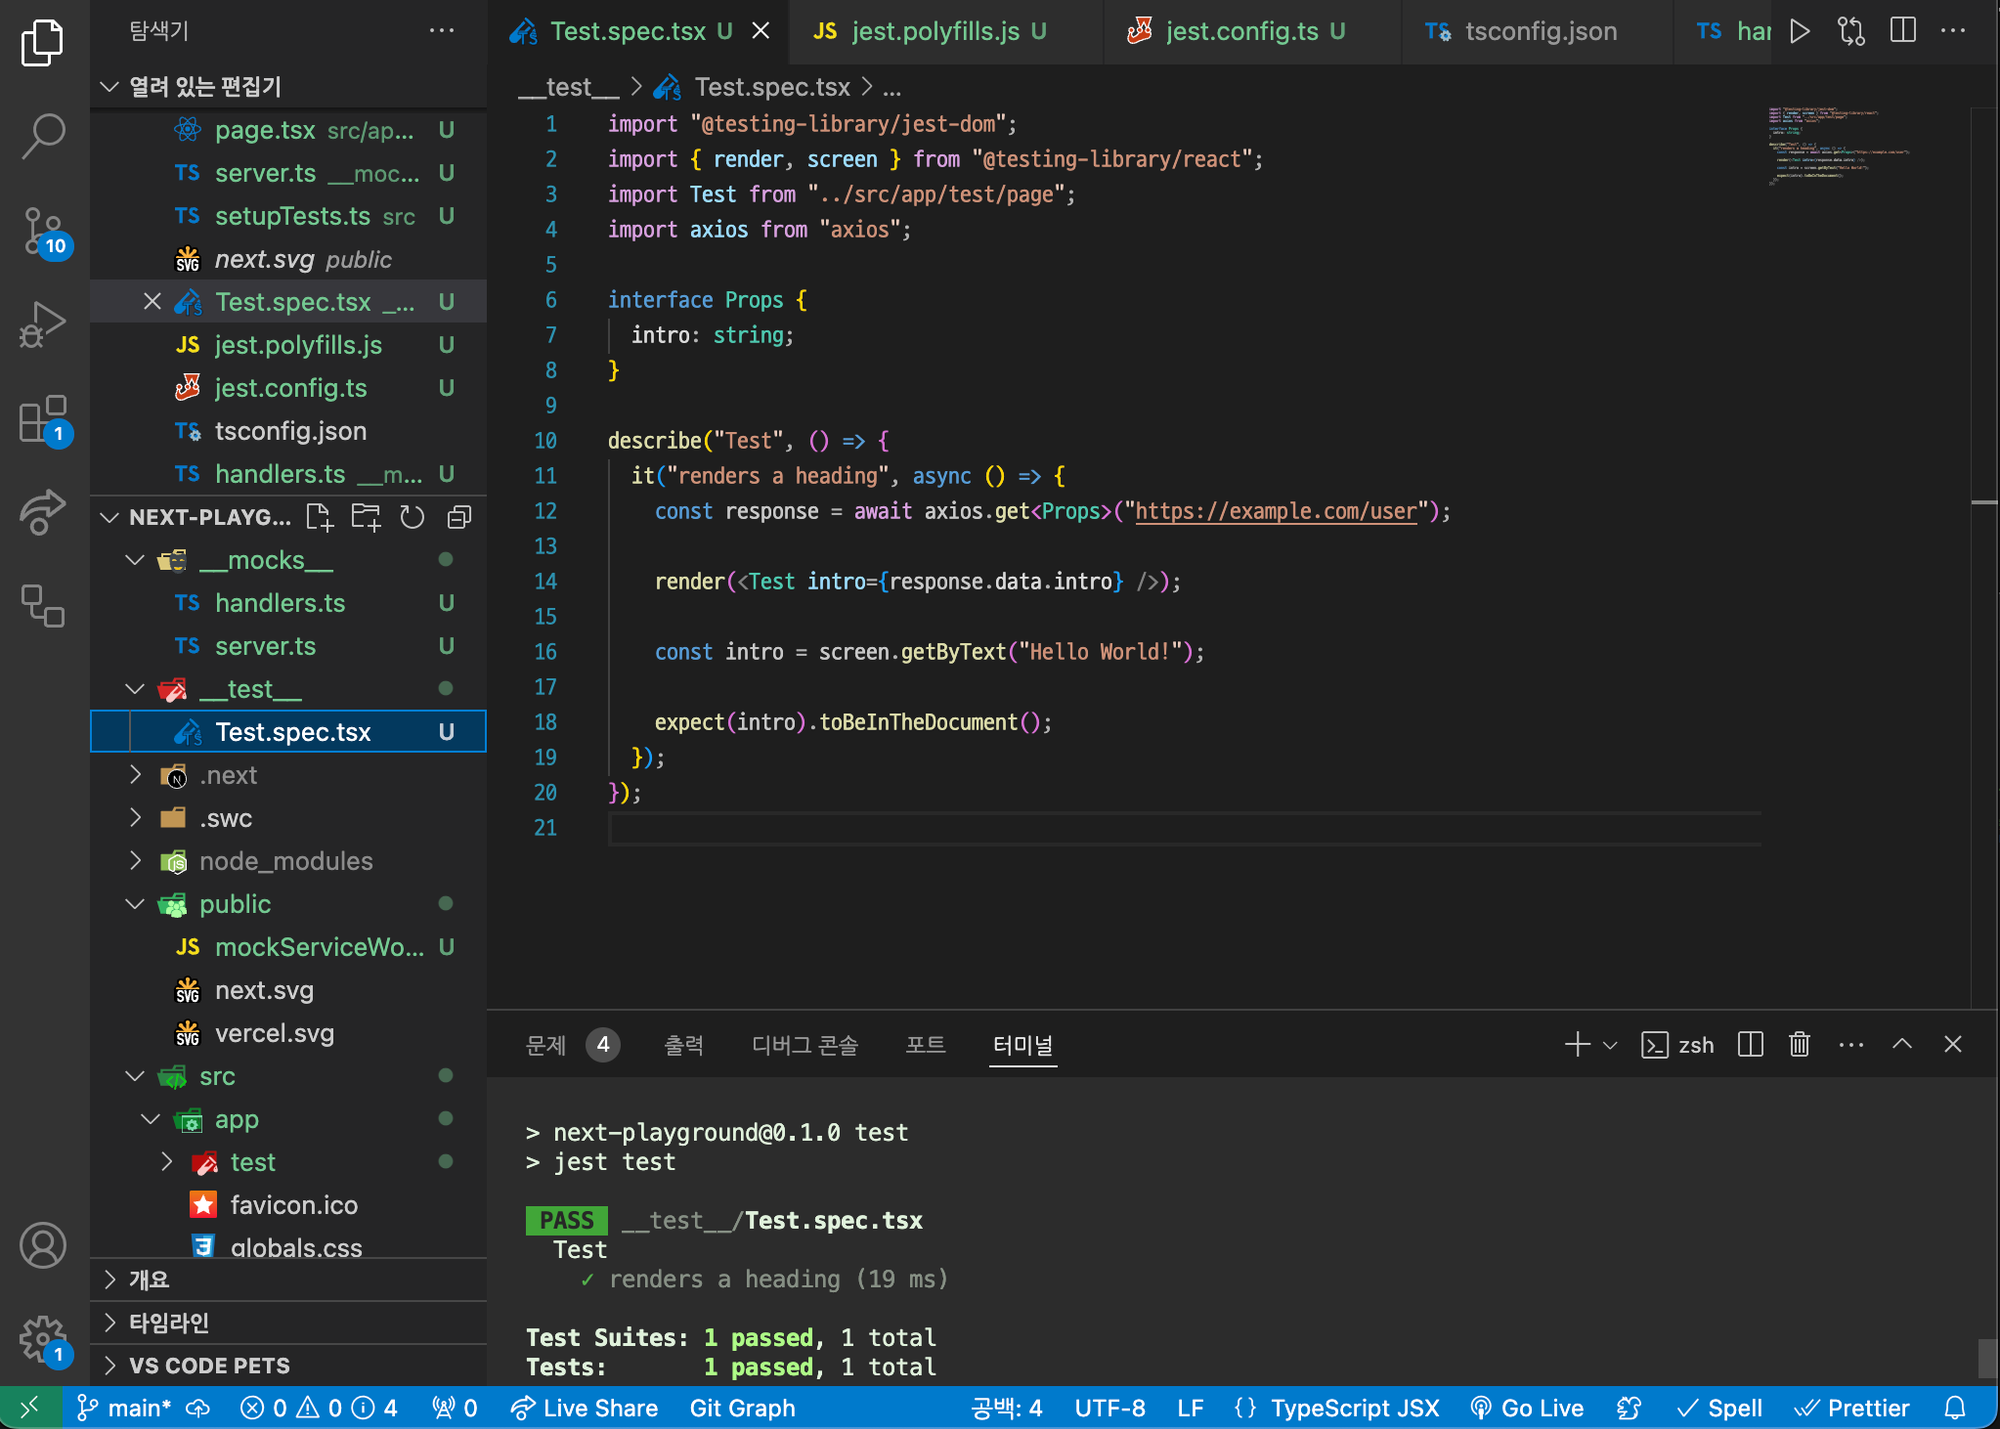
테스트를 돌려보면 잘 작동합니다. 수고하셨습니다.